
How a Self Build Planning Map Supports Approval
A self build planning map is one of the first documents a planning officer uses to understand where your proposal sits and what land it affects. If the boundary is unclear, the scale is wrong, or the map is not based on licensed mapping, a well-designed home can still face an avoidable validation delay.
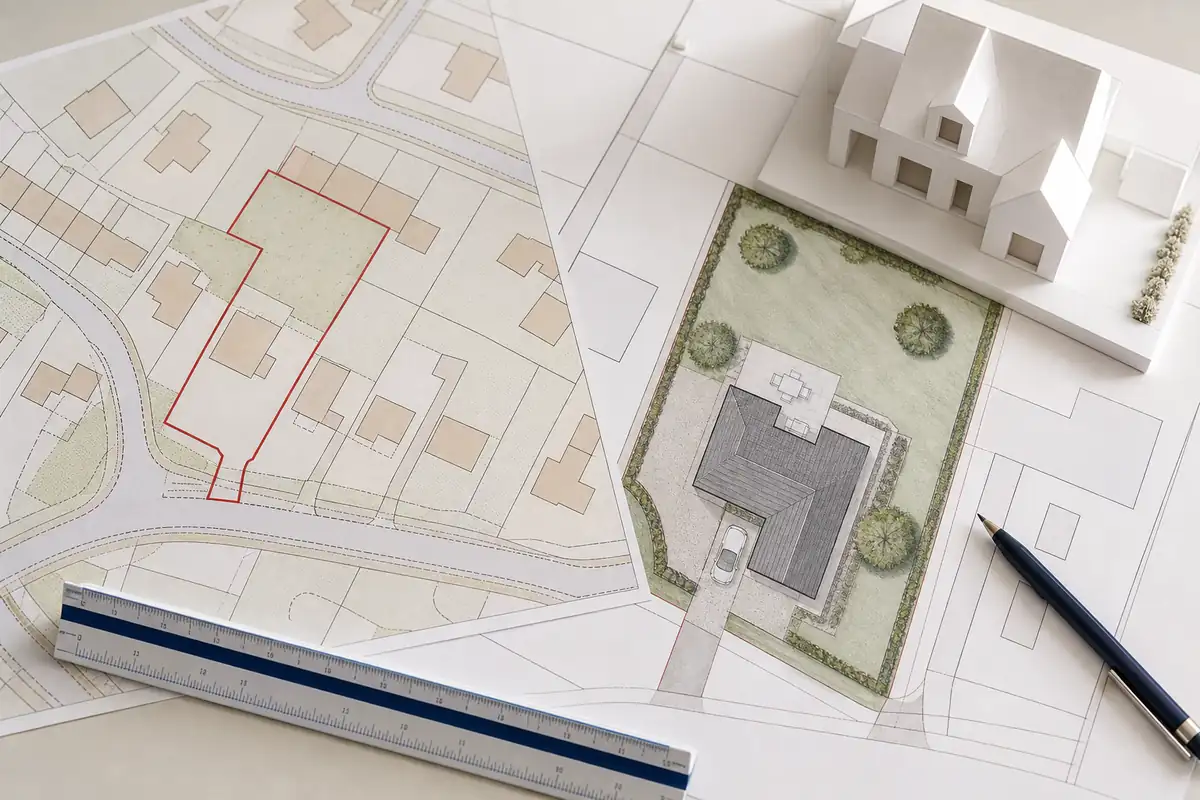
A self-build planning application has to explain where the plot is and how the proposed home will sit on it. A self build planning map connects the design drawings to a real piece of land, but only when the right plan, scale and boundaries are used. Requirements vary, so check the local planning authority's current validation list before submitting.
What a self-build planning map shows
A self build planning map is not one single type of drawing. It is a general description for the mapped plans used to identify the application site and show the proposal in context. For a new home, that will often include a location plan and a more detailed site plan, also known as a block plan.
The location plan establishes where the plot is. The site plan moves closer and shows how the dwelling relates to the boundary, access and neighbouring land. Architectural plans provide the building's detailed layouts, elevations, sections and dimensions.
These documents need to agree. If the location plan encloses one area but the site plan puts the house or driveway outside it, the planning officer may need clarification. The address, plot and access should also match.
The map normally shows existing features, not an unbuilt house or new access. Those details belong on the appropriate proposed drawings.
For a self-build plot, the surrounding context can be just as important as the house position. The authority may need to understand how vehicles reach the site, how the new home relates to neighbouring buildings and whether boundaries, trees or other features are affected. Show what is relevant to the proposal, using the validation checklist as the guide.
Clarity matters more than filling every empty space with a label. Keep boundary lines visible and use short annotations where needed. Detailed dimensions and construction information belong on the design or technical drawings, leaving the planning map easy to read at normal size.
Location plan versus site plan, and why both may be needed
A location plan answers the question: where is this application site? It shows the plot in relation to surrounding roads, buildings and other recognisable features. The application land is marked with a red line boundary so the authority can identify its extent.
A site plan or block plan answers a different question: how does the proposed development fit within and around the site? At a closer scale, it can show the proposed house, existing buildings, plot boundaries, access, parking, turning space, trees, hard surfaces and neighbouring properties where these are relevant.
Many self-build applications need both. A close site plan may show the home clearly but not enough surroundings to identify a rural plot. A wider location plan may identify the land but be too small to explain the driveway or building position.
Wording varies: one authority may ask for a block plan, another for a site layout plan. Look at the required scale and content. The validation list should also identify other plans and supporting reports.
Choosing the right map scale
Location plans are commonly prepared at 1:1250 or 1:2500. A 1:1250 map often suits a plot in a built-up area, keeping it visible while showing the street. A 1:2500 plan covers more ground and can suit rural land, larger plots or sites reached from a track.
More coverage is not always better. A very wide map can make the red line hard to understand, while a tight crop may omit the road or buildings that identify the site.
The site plan or block plan is commonly prepared at 1:500 or 1:200. A 1:500 plan covers more of a larger plot. At 1:200, buildings, boundaries and access appear larger on a compact site.
Use the scale stated by the authority where one is specified. Also make sure the final PDF is printed at its intended paper size and at 100% or actual size. Selecting “fit to page” can resize the plan and change the printed scale.
Drawing the red line boundary and blue line correctly
The red line boundary should enclose all land included in the planning application, not only the house footprint. That may include the garden, driveway, public-road access, parking, turning area, drainage land and landscaping where they form part of the proposal.
Outlining only the dwelling does not necessarily identify the application site. The red boundary should agree with the application form, ownership certificate, site plan and proposed drawings.
Other nearby land owned by the applicant may need a blue line. If a self-builder owns the field beside the plot but applies only for the plot and access, the field may need blue rather than being included in red.
The blue line planning application boundary guide explains this further. Blue does not make land part of the development; it identifies other nearby land in the applicant's ownership.
Do not treat features on an Ordnance Survey map as a definitive record of legal ownership. Use the appropriate title information, deeds and professional advice where the ownership boundary is uncertain. Mapping provides the base; the applicant remains responsible for marking the land covered by the application accurately.
Why licensed Ordnance Survey mapping matters
A screenshot from a consumer map may look clear on screen but still be unsuitable for a planning application. It may have no dependable printed scale, lack the required detail or be restricted by licensing terms. Cropping and resizing can introduce further problems.
Professionally supplied Ordnance Survey mapping provides a consistent base with a stated scale and suitable licence information. The finished map should include north and remain legible at its intended size.
Licensed mapping neither decides the application nor draws the proposed home. It places the site, surrounding features and annotations on a recognised base.
Check the whole submission before sending it
Compare the final self build planning map with the rest of the application. Correcting a mismatch before upload is easier than doing so during validation.
Check that:
- The location plan and site plan show the same plot
- The whole application site sits within the red line boundary
- Other nearby owned land is shown with a blue line where required
- The proposed house, access and parking are in the same position on every drawing
- The map scale, north point and useful surrounding features are visible
- The address and site description match the application form
- The PDF remains readable at normal viewing size and when printed correctly
For land without a postal address, include enough context to find it, such as a named road, nearby buildings, field boundaries or access. Coordinates can help with the search but do not replace a required plan.
Look for practical contradictions. If a new access or drainage area sits outside the red line, revisit the documents. Take advice where the proposal crosses land in different ownership.
Planning permission and building regulations approval are separate. A planning map describes the site; it does not demonstrate structural safety, energy performance or Building Regulations compliance. A self-build project will need further technical drawings and approvals.
When a standard planning map is not enough
A standard location plan and site plan suit many plots, but some need more. A slope may require a topographical survey and levels; trees may need an arboricultural plan. Road access, drainage, ecology, landscaping or flood risk may need separate information.
Large, irregular or remote sites may need bespoke coverage to keep the red line and surroundings clear. A suitable architect, consultant, surveyor or engineer can advise.
The standard map is the starting point. It identifies the land, while proposed and specialist plans explain what ordinary mapping cannot.
Give the planning officer a consistent set of plans
A good self build planning map should make the application easier to understand, not give the reviewer another puzzle to solve. Choose the scale for the site, mark the red and blue boundaries carefully and check that every drawing refers to the same proposal.
That final comparison matters more than adding unnecessary detail. When the maps, forms and drawings agree, the authority can identify the plot and move on to considering the proposed home itself.
Ready to Get Your OS Plans?
Every plan is instantly downloadable, Planning Portal‑compliant, and includes all required elements. Get your plan now and submit your application with confidence.