
Professional Mapping for UK Planning Applications
Good planning drawings should answer questions, not create them. Where is the site? What is there now? What will change? Professional mapping gives you a clear starting point, whether you are preparing a householder application or putting together a larger drawing package for a client.
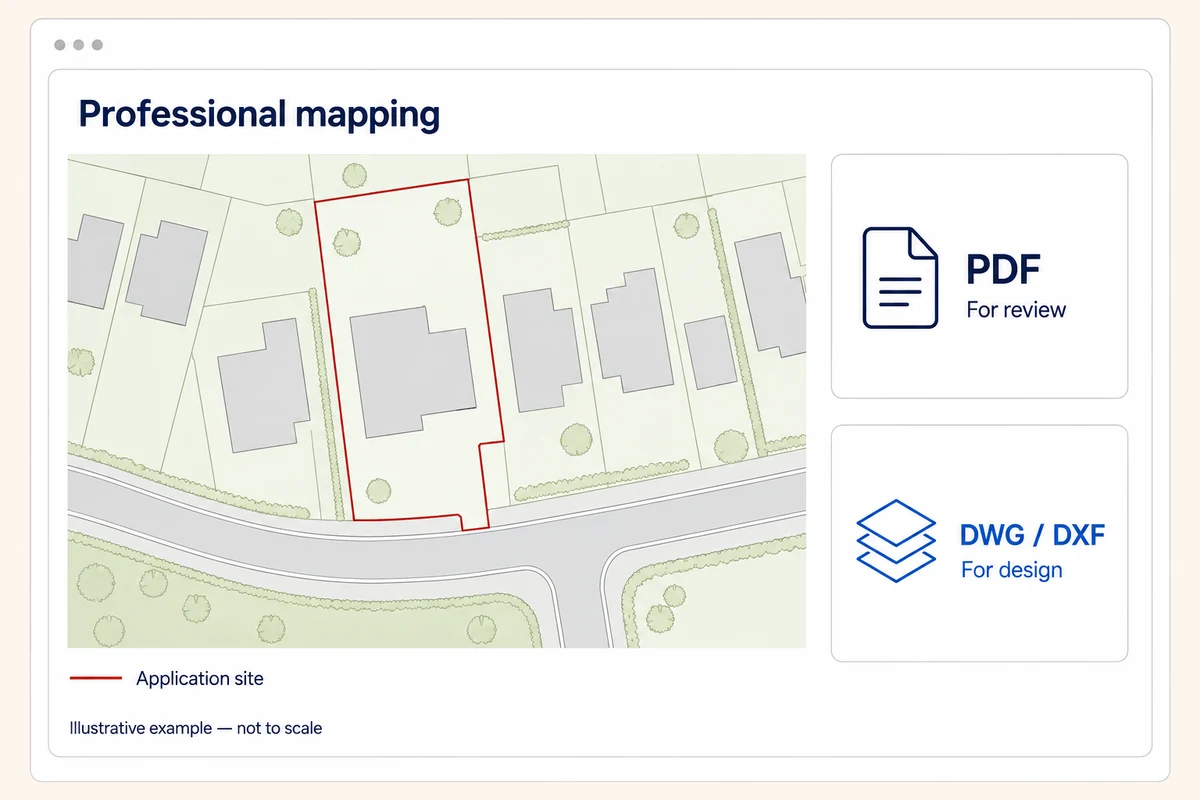
What professional mapping means for planning
Professional mapping for UK planning applications is about choosing reliable, appropriately licensed mapping and using it properly. A detailed map is useful, but it still needs the right coverage, scale and annotations for the application.
Start with the council's current validation checklist and the proposed scope of work. Requirements depend on the application and location; guidance for England should not be treated as a single rulebook for the whole UK.
Before anyone orders, agree a short mapping brief:
- Purpose: location plan, proposed site layout or a base for design work?
- Extent: which boundaries, access routes and surrounding properties must be visible?
- Deliverables: PDF, editable CAD, intended paper size and required scales?
- Responsibility: who checks existing conditions, adds the proposal and approves the final drawing?
This avoids a familiar problem: the client orders a finished-looking map while the designer expects an editable base. A purchased base map does not include your proposed development or replace the rest of the planning drawings.
The plans most applications require
The two maps serve different purposes. Our location plan and site plan guide explains the distinction in more detail.
Location plans show the wider setting
A location plan identifies the application site among surrounding roads, buildings and other recognisable features. Someone who has never visited should be able to place it without following a separate set of directions.
Show the whole application site, including relevant access, rather than simply centring the main building. A rural plot may need a wider view to include a named road or useful landmark.
Site and block plans show the proposal in context
A site or block plan gives a closer view of the land and its surroundings. Depending on the application, it may need buildings, access, parking, trees, hard surfaces, boundary treatments and relevant neighbouring features.
The proposed works must be added and distinguished from what already exists. Use clear labels or a simple key for demolition, retained buildings and new development. Check that the arrangement matches the floor plans and elevations; neither drawing should tell a different story.
Keep enough space around the plot to explain its relationship with adjoining land. Cropping precisely to the red line can remove the neighbouring wall, shared entrance or nearby building that helps the reader understand the proposal.
Choosing the right scale without overcomplicating it
Location plans are commonly prepared at 1:1250 or 1:2500, and site or block plans at 1:200 or 1:500. These are typical choices, not the only scales that can be appropriate. Follow the council's requirements.
Choose the coverage first. A long access road might need more room than the development itself. Then check whether labels and boundaries remain readable at the intended paper size. Enlarging the house is little help if the entrance disappears off the page.
Keep the stated scale and north point visible. A scale bar is useful and may be requested locally. When printing a scaled PDF, use its intended paper size and avoid a fit-to-page setting that changes the scale.
Check labels at the final sheet size too. Text that looks comfortable while zoomed in may be unreadable on the submitted drawing, especially where several dimensions meet at one corner.
For CAD users: work with the mapping at 1:1 in the intended drawing units. Set the presentation scale through the layout or viewport, rather than resizing the underlying geometry. Check a known distance after import; an incorrect unit setting can make a plausible-looking drawing the wrong size.
Boundaries: the detail that causes most confusion
The red application boundary is not an outline of the proposed building. In England's national application guidance, it includes all land necessary to carry out the development, such as relevant access, parking and landscaping. Agree its extent before preparing the rest of the drawings.
Other land owned by the applicant, close to or adjoining the application site, is edged blue under that guidance. Do not automatically mark neighbouring land blue simply because it appears on the map. Our red line boundary guide and blue line boundary explanation cover the difference.
A mapped fence or wall is a physical feature, not proof of the exact legal ownership boundary. If ownership or access is uncertain, resolve the relevant evidence and advice rather than assuming the mapping settles it.
Use a line weight that remains clear without hiding building corners or narrow access strips. In CAD, keep the application boundary and proposed works on separate layers from the base mapping. This makes revisions easier to check and reduces accidental changes to the source.
Practical help can matter here. In a review on our homepage, S P George described Evelyn helping draw boundary lines and add a road name for a rural site. The useful lesson is to check whether the finished map identifies the site clearly, particularly where addresses are less straightforward.
Why screenshots and free maps can fall short
A web map can help you find a property without being suitable for a planning submission. Screenshots may lose scale when resized, omit detail or lack permission for the intended copying and use.
UK Planning Maps supplies Ordnance Survey mapping based on OS MasterMap data for sites in Great Britain. Keep the copyright and licence information visible, including when placing mapping into a larger drawing sheet.
Reliable mapping is not the same as a new measured survey. Compare it with the site as it stands: recently built structures, removed buildings or altered entrances may need checking and updating. Do not use the apparent precision of a line on screen as evidence that a critical dimension has been measured.
Choose the file around the job. PDF suits a fixed-layout map for review or submission; DWG or DXF is useful where a designer needs editable mapping. Our CAD maps are georeferenced. Agree the coordinate system, units and relationship to any survey before combining files. Avoid moving the mapping to an arbitrary origin without recording an agreed transformation.
A practical way to prepare your plans
Find the property by postcode, or use Advanced Search where there is no suitable postcode. Select the map extent and scale, then check the preview against the agreed brief.
Before completing the order, check the whole site, surrounding detail and any boundary you have drawn. Download the mapping and keep an unchanged source copy alongside the working files.
A simple handover routine helps when several people touch the drawings:
- Record the source. Keep the order reference, download date, mapping extent and licence details with the project.
- Add the design. Clearly distinguish existing features, proposed works and anything to be removed.
- Identify revisions. Use your practice's drawing numbers, revision system and issue date. For example,
Project-SitePlan-P02.pdfdistinguishes an issued revision from an unnamed draft. - Check the issue set. Open the actual exported PDFs and compare their titles and revisions with the drawing register before uploading.
Our sister website, Planning Maps UK, has a planning map checklist with 12 checks before submission. It is useful for checking paper sizes, exported files and consistency across the drawing set. Use it alongside the council's current requirements, not as a guarantee of validation.
After a design change, check every affected drawing rather than just the sheet you edited. Moving an entrance, for example, may change the site layout, access annotations and application boundary. Ask one named person to confirm the complete set is ready to issue.
If you order regularly, see our trade accounts. For help choosing mapping, call 01856 898 022.
When a standard plan is not enough
A larger, sloping or constrained site may need more than base mapping. Where the design depends on levels, drainage, tree positions or tight distances, agree whether a measured topographical survey or specialist information is needed.
Height data is not automatically a substitute for surveyed thresholds, drainage levels or finished floor levels. Ask your designer or surveyor which measurements and accuracy the project needs.
If you use terrain or contour data, record its source, interval or resolution, and vertical datum: the reference used for the heights. Ground levels and building heights are different information. A dataset suitable for understanding the wider slope may not resolve a doorstep, kerb or drainage connection.
The aim is a consistent drawing package: suitable mapping underneath, checked site information where necessary, and a proposal that is easy to understand.
Ready to Get Your OS Plans?
Every plan is instantly downloadable, Planning Portal‑compliant, and includes all required elements. Get your plan now and submit your application with confidence.