
How Planning Application Maps Support Your Submission
A planning application can be delayed by something as basic as an unclear red line or a map printed at the wrong scale. Planning application maps are not decorative attachments. They show the local planning authority exactly where your proposal sits, what land is included, and how the site relates to its surroundings.
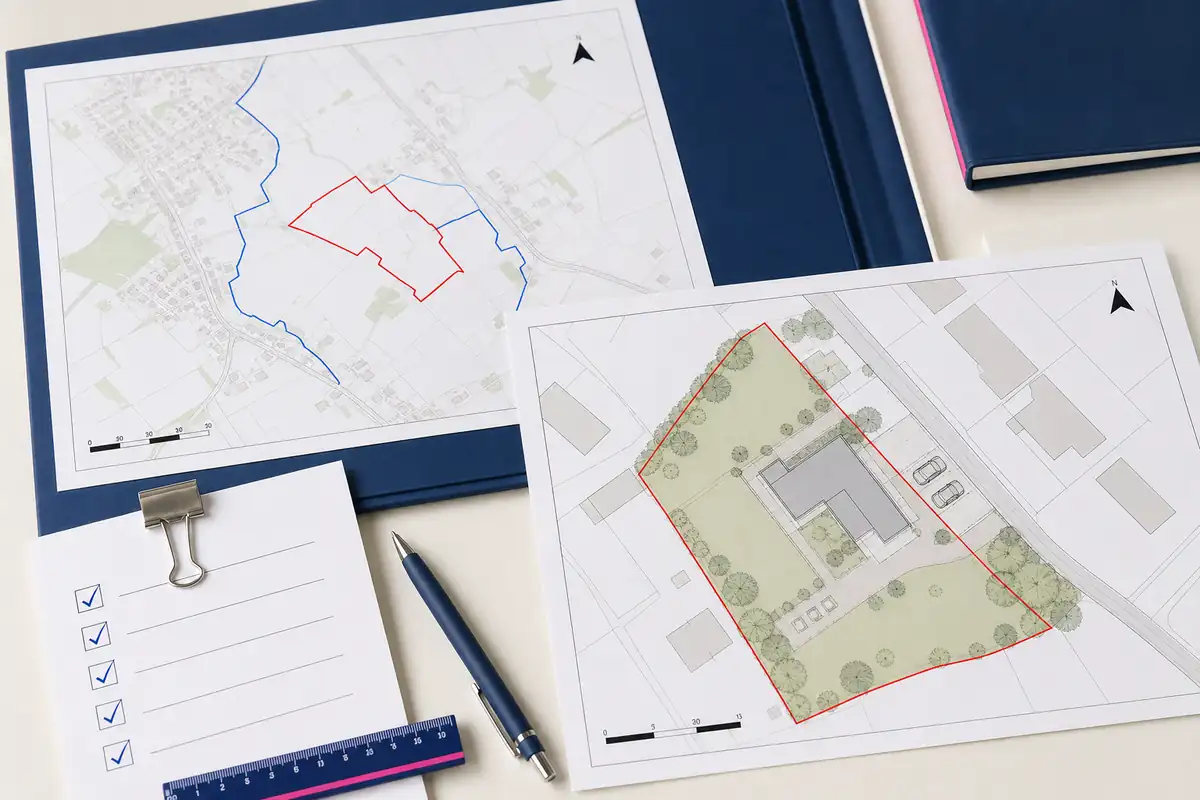
Planning application maps show the local planning authority where a proposal is and which land it covers. The scale, boundary and map area still need careful thought: somebody unfamiliar with the property should be able to identify the site and relate it to the other drawings. Requirements vary, so begin with the authority's current validation list.
What are planning application maps?
Planning application maps are scaled plans that identify the site and show it in context. The two usual names are location plan and site plan, also often called a block plan.
A location plan shows the land within the wider area. Nearby roads, buildings and recognisable features help identify it. The application land is normally marked in red.
A site plan or block plan is a closer view. It may show existing buildings, proposed work, access, parking, boundaries, neighbouring properties, trees and hard surfaces.
Maps do not replace architectural drawings. Floor plans, elevations and sections describe the building, while drainage, levels, highways, trees or landscaping may need specialist information. Mapping provides the geographical base for those documents.
Many applications need both because they answer different questions: “Where is the site?” and “How does the proposal sit on it?” Follow the authority's document list.
Common scales and what they are used for
Planning maps use metric scales. The right one depends on the site, plan type and authority's requirements.
Location plans are commonly prepared at 1:1250 or 1:2500. A 1:1250 plan often suits a house or smaller built-up plot, keeping the site visible while showing the surrounding street.
A 1:2500 plan covers more ground and can suit rural properties, fields, larger sites or land reached from a track. If the red line becomes too small, another map area or format may be better.
Site plans and block plans are commonly produced at 1:500 or 1:200. A 1:500 plan shows more of a larger plot. At 1:200, buildings, access and boundaries appear larger on a compact site.
These scales are typical, not universal. Follow the validation list or written request and keep the whole relevant site clear on the page.
When printing a PDF, use its intended paper size and 100% or actual size. “Fit to page” can alter the scale.
Marking the red line and blue line
The red line identifies the land covered by the planning application, not simply a proposed building footprint. It may include a garden, driveway, public-highway access, parking, landscaping or drainage land.
An incomplete red line can contradict other documents. If a proposed access shown on the site plan forms part of the application, it may need to sit inside the location plan boundary.
Other nearby land owned by the applicant may need a blue line when outside the application site, such as an adjoining field or garden. Blue gives ownership context; it does not add land to the development.
The red line boundary guide explains the marking process. Take suitable advice for a complicated title, leasehold interest, shared access or uncertain boundary.
A feature on Ordnance Survey mapping is not necessarily the legal ownership boundary. Use the relevant title information when placing red and blue lines.
What a compliant plan should show
A compliant plan meets the requirements for its particular submission. No short checklist replaces current local guidance, but a planning map will commonly need to show:
- The whole application site at an appropriate metric scale
- A clear north point and stated scale
- Enough roads, buildings or other features to identify the location
- A visible red line around the application land
- A blue line around other nearby owned land where required
- Current, suitably licensed mapping that remains legible at the intended size
A location plan should be centred sensibly enough that the red line is clear and the site can be found from the surrounding information. Showing more land is not automatically helpful: a large map can make a small application boundary difficult to see. Equally, cutting the map tightly around the site can remove the road or neighbouring buildings that establish its position.
A site plan may also need the proposal and relevant existing features. Access, parking, neighbouring buildings, trees, rights of way, hard surfaces, walls and fences may matter, depending on the work.
The proposed development will not normally appear on an existing mapping base. It needs to be shown on the appropriate proposed site drawing, in the same position as on the floor plans, elevations and other design documents. Use a clear outline or label where required without covering useful map detail. A planning officer should be able to distinguish what exists from what is proposed.
Ordnance Survey mapping is commonly used because it provides consistent detail and can be supplied with a suitable licence. Check what the authority accepts; no one source or format should be assumed to be universally mandated across the UK.
Creating planning application maps quickly
An online service can provide a straightforward map quickly, but it still needs checking. Have the address or postcode, plan type, scale and boundary ready.
Find the correct property or land. Where a postcode covers several buildings, compare their shapes and roads. Coordinates or a map search can help with woodland, agricultural land or a plot without an address.
Choose the required plans and scale. Show the whole site with enough context; a plot at the page edge or a rural site without its access can be hard to understand.
Draw red carefully and add blue only where needed. Compare the boundary with the form, ownership certificate and drawings, including any driveway, access or separate work area.
Take extra care with a rural, irregular or unusually large site. A standard map area may not show the complete access route or enough landmarks to locate the land. Rather than forcing everything into an unsuitable scale, check whether a larger paper size, different coverage or bespoke map is needed. The red line still has to remain clear when the PDF is viewed or printed.
Before paying, check the location, coverage, scale, north point and lines. Repeat this with the downloaded PDF and save the original with the submission.
PDF is often simplest for uploading and printing. Professionals adding detail in design software may prefer CAD mapping files. A CAD base still needs the right scale and boundary.
Common mistakes when submitting maps
The wrong plan type is a frequent problem. A 1:500 site plan may lack the wider location context, while a 1:1250 location plan may not explain building positions, access or parking.
The red line may stop at the building, omit access or include unrelated property. Blue may be omitted where needed or used as though it forms part of the application site.
Consumer-map screenshots and old estate-agent plans may lack a dependable scale, north point, current detail or suitable reproduction rights. Resizing can create another scale problem.
File handling creates less obvious mistakes. An applicant may upload an early PDF without the final boundary, attach the location plan twice or select a version intended only for checking. Open every uploaded file from the application screen if possible, not simply from the folder on your computer. Check the title, scale, colour lines and page orientation, and remove superseded copies so there is no doubt which plan should be assessed.
Do not assume an earlier plan remains suitable. Boundaries, access, mapping or the proposal may have changed, and annotations must match the current application.
Compare every file before upload. The address, red line, proposed building and access should agree. Clear filenames should distinguish the location plan from the site plan.
Clarity is the real test
Planning application maps should make the submission easier to understand. The site, application boundary and proposed drawings should connect without guesswork.
Too many notes can cover buildings, roads or boundary details. Use a clean area, accurate lines and only necessary annotations.
Ask somebody unfamiliar with the site to look. Can they find it, see which land is included and tell that the location plan and block plan refer to the same proposal?
Getting the mapping right does not decide whether planning permission will be granted. It does, however, give the authority a clear and consistent starting point for validating and assessing the application. Choose the plan carefully, follow the local requirements and check the final PDF rather than relying only on the online preview.
Ready to Get Your OS Plans?
Every plan is instantly downloadable, Planning Portal‑compliant, and includes all required elements. Get your plan now and submit your application with confidence.