
Site Plan for Planning Permission Requirements
A planning application can be delayed before anyone considers the design of your extension or development. One of the most common reasons is simpler: the submitted map does not clearly show the application site, its boundaries, or the work being proposed.
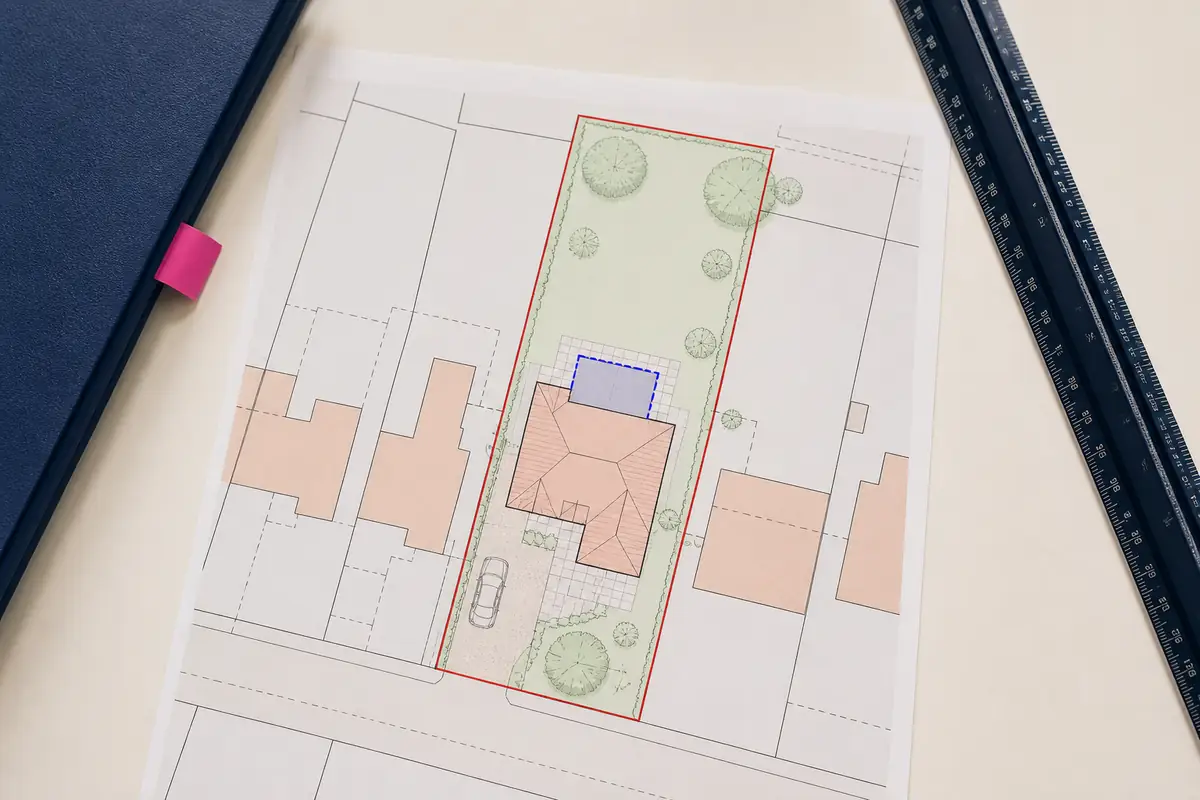
A site plan shows the local planning authority how proposed work sits within a property or piece of land. If the scale is wrong, the boundary is unclear or an important feature is missing, the application may be held up before the design itself is considered. This guide explains the usual site plan for planning permission requirements and what to check against your council's validation list.
What is a site plan?
A site plan is a scaled view of the application site and its immediate surroundings. Also commonly called a block plan, it helps the planning officer see the relationship between the proposed development, existing buildings, boundaries, access and neighbouring land.
For a house extension, it might show the house, garden, driveway, adjacent homes and proposed work. A larger scheme may also need parking, access routes, trees, hard surfaces or other affected features.
It is not an architectural floor plan. Floor plans show the internal arrangement and elevations show the outside; the site plan puts those drawings in their physical setting.
You can see a fuller explanation and examples in the guide to site plans and block plans.
Site plan for planning permission: the usual requirements
Start with the local planning authority's validation checklist. The exact information depends on the application, but most planning site plans need the following basics.
A recognised metric scale
Site plans are commonly prepared at 1:200 or 1:500. At 1:200, features appear larger, which often suits a house, extension or compact plot. A 1:500 plan covers more ground and can work better for larger properties or sites needing more context.
The scale should be stated and preserved when printed. Follow the council where it specifies one. Otherwise, choose the scale that shows the whole site and relevant surroundings clearly.
A north point and identifiable surroundings
North should be clear. Show nearby buildings, roads and useful features without cropping so closely that context is lost or so widely that the proposal becomes hard to read.
The application site outlined in red
The red line identifies all land included in the application, not only the proposed building footprint. It may include the house, garden, access, parking, landscaping or drainage area.
If a new access or altered driveway forms part of the application, the red line may need to reach the public highway. It should agree with the form, ownership certificate and drawings.
Other owned land shown in blue where required
Nearby land owned by the applicant may need a blue outline when it sits outside the red line, such as another garden, field, access strip or property.
Blue does not mean the land forms part of the development; it explains wider ownership. Ask for advice if the ownership or leasehold position is complicated.
Relevant site features
Depending on the work, show existing buildings, the proposal, access, parking, gardens and neighbouring properties. Roads, rights of way, trees, hard surfaces, walls and fences may also be relevant.
Not every plan needs every feature. Show what could influence the proposal or be affected by it, using the council's list and the nature of your project as the guide.
The proposed work must be understandable
The underlying map will normally show what exists now; it cannot know what you intend to build. Your proposed extension, new dwelling, access or other work therefore needs to be shown on the appropriate proposed drawing. Some councils also expect it to be clear on the site plan.
Use a simple outline and label where this is requested, and make sure its position agrees with the floor plans and elevations. Avoid turning the site plan into a crowded design drawing. It should explain where the proposal sits, while the detailed architectural drawings explain its dimensions and appearance.
Site plan, block plan and location plan: what is the difference?
“Site plan” and “block plan” often describe the same detailed map. Council wording varies, so concentrate on the requested scale and information.
A location plan shows the wider area, commonly at 1:1250 or 1:2500. The site or block plan is normally at 1:200 or 1:500 and shows how the proposal relates to nearby features.
Many applications require both. If the checklist asks for two documents, a close site plan does not replace the wider location plan.
How to prepare a clear site plan
Read the validation checklist for your application type and note the requested scale, paper size and features before buying anything.
Find the property by postcode, address, coordinates or map search. Choose current licensed mapping and show the full site plus enough adjoining land to explain access and boundaries.
Draw the red line carefully and keep it visible over the map detail. Add blue only for other nearby owned land where required. A short proposal label can help, but it should not cover useful information.
Compare the map with the proposal drawings. Is the work on the same side of the building? Is the access inside the red line? Viewing the documents together makes contradictions easier to spot.
With UK Planning Maps you can find and order a site plan online, add the boundaries and download the finished PDF. Open the downloaded file and check it again at normal viewing size. If printing, use 100% or actual size rather than “fit to page”, which can change the printed scale.
A red line mistake that was easy to put right
Boundary errors do happen, particularly when somebody is ordering a planning map for the first time. In Mr Miller's review, he explained that he had accidentally ordered his plan without the red boundary. He rang UK Planning Maps, and the team corrected the map and sent it again with the red line in place.
That is a practical example of why it is worth opening the PDF as soon as it arrives. If a line is missing or the map does not look as expected, dealing with it before uploading the application is much simpler than waiting for the council to raise it.
Common site plan problems
An incomplete red line is an easy mistake. Applicants sometimes outline the extension rather than the application site, or leave out a driveway, access or parking area.
Another problem is choosing the wrong plan. A 1:1250 location plan may identify the address but be too broad for the detail expected at 1:200 or 1:500.
Screenshots and old estate-agent plans may lack a reliable scale, north point, current detail or the correct licence. An older planning map may also be unsuitable if the site has changed.
Check legibility too. Boundaries should be distinct without hiding map features, and labels must remain readable in the PDF and at the intended print size.
When the map is only the starting point
A standard site plan gives the mapping base, but some applications need technical drawings. Vehicle access, trees, drainage, levels, visibility splays, landscaping and complicated boundaries can all call for specialist information.
An architect, planning consultant, surveyor or other appropriate professional can advise where the proposal goes beyond a straightforward map. Designers who need to add detailed work in their own software may prefer CAD mapping, and regular professional users can look at trade account options.
The site plan still provides a consistent reference for the property, application area and surroundings.
Final site plan checklist
Before submitting, check that the plan:
- Uses the scale requested by the council
- Shows north and enough surrounding context
- Includes the whole application site inside a clear red line
- Shows other nearby owned land in blue where required
- Includes relevant buildings, access, parking and site features
- Agrees with the application form and design drawings
- Is clear in the downloaded PDF and at its intended print size
A correctly prepared site plan cannot decide whether planning permission will be granted. What it can do is give the authority the clear information it needs to validate and understand the application. A few careful checks now are much easier than replacing the map once the application is under way.
Ready to Get Your OS Plans?
Every plan is instantly downloadable, Planning Portal‑compliant, and includes all required elements. Get your plan now and submit your application with confidence.