
How to Draw a Red Line Boundary for Planning
A red line does more than show where a proposed extension will sit. On a planning map, it tells the local planning authority exactly which land is included in your application. If the boundary is unclear, too tight, or accidentally excludes access land, a valid project can be delayed while the plan is corrected. Knowing how to draw red line boundary correctly before you submit helps avoid that problem.
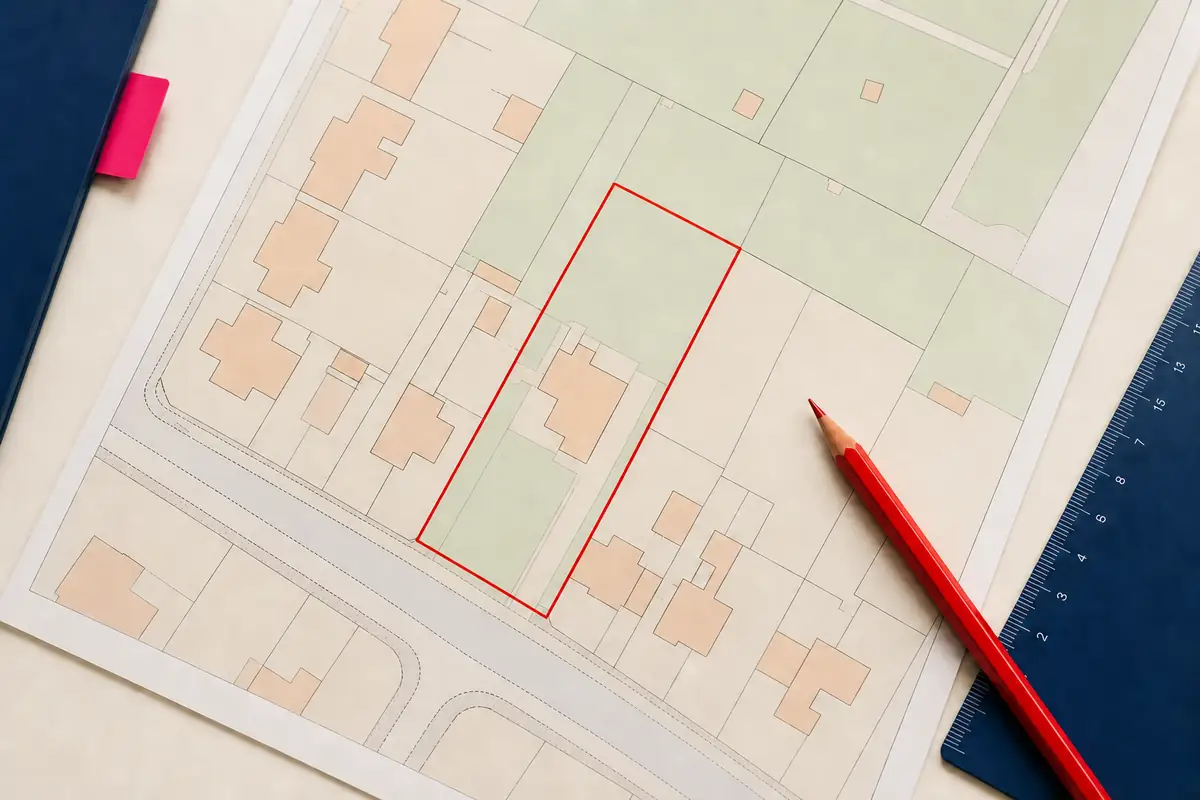
The red line on a planning map looks like the easy part. You find the property, trace around it and carry on with the application. In practice, this small line does an important job: it tells the council exactly which land the application relates to.
If the line leaves out the access, stops before it reaches the road or surrounds only the footprint of a proposed extension, the council may ask for a corrected plan. Taking a few minutes to understand the red line boundary before you draw it can save that extra exchange later.
What does the red line boundary mean?
The red line defines the application site. It should enclose the land connected with the proposal and any land needed to carry out the development. The council uses it to understand the area covered by the application, so it needs to be clear, continuous and consistent with the rest of your documents.
It is not simply a highlighter around the new building work. If you are applying for a rear extension, for example, drawing a tight red box around the extension footprint will not normally describe the application site properly. The existing house, relevant garden and access may all form part of the site shown on the plan.
The red line is also not proof of the exact legal boundary. Ordnance Survey mapping shows physical features, but a line on a planning map should not be treated as a definitive statement of ownership. If there is a genuine ownership or boundary dispute, check the title documents and take professional advice rather than relying on the planning map alone.
What should the red line include?
Start with the land the application is about. Then consider what else is necessary for the development to take place or be accessed. Depending on the proposal, that could include:
- The house, building or parcel of land concerned
- The front and rear garden where they form part of the application site
- A driveway, track or path used to reach the public highway
- Parking or turning space connected with the proposal
- Other land required for construction, servicing or access
The useful test is whether the red line includes the complete application site and the land needed for the proposal. Your local planning authority's validation checklist may give more specific instructions, so read that before finalising the map.
How to draw a red line boundary for planning
Begin with a current, correctly licensed site location plan at a recognised scale. Location plans are commonly produced at 1:1250 or 1:2500. Choose a scale that keeps the whole site on the page while showing enough roads and buildings to identify it.
1. Find the right site
Search by address or postcode where possible, then check the building shape and nearby roads rather than assuming the first result is correct. For fields, woodland or land without an address, use coordinates or navigate to the site carefully on the map.
2. Decide what belongs inside the line
Before clicking around the boundary, look at the proposal, application form and other drawings together. Work out whether access, a driveway, garden land or another part of the property needs to be included. This is easier than redrawing the line after you notice an omission.
3. Follow the outside of the application site
Place points around the perimeter in order. Use enough points to follow changes in direction, but do not add so many that the line becomes untidy. The line should be easy to follow and close back at its starting point, creating one complete shape.
4. Include the route to the road where necessary
If the site is set back from the highway, check the access carefully. A common mistake is to outline the house or plot but leave the access track outside the red line. Where that route is necessary for the development, it should normally be included.
5. Check the line at normal viewing size
Zooming in makes precise drawing easier, but the finished map also has to work at its intended page size. Make sure the red line is visible without covering road names, building outlines or other useful details. A thick or untidy boundary can make the map harder, rather than easier, to understand.
Red line and blue line: what is the difference?
The two colours have different purposes. The red line encloses the application site. A blue line is used for other land owned by the applicant that is close to or adjoining the application site but is not included in the proposal.
Suppose you own a house, its garden and a separate strip of land next door. If the application relates only to the house and garden, those may sit inside the red line while the separately owned land is edged in blue where required.
Do not put all your land inside the red line merely because you own it. Equally, do not use a blue line for land owned by somebody else. The guide to site location plans explains the usual red and blue boundary requirements in more detail.
Common red line mistakes
One of the most frequent errors is drawing around the proposed building work only. The planning officer needs to understand the application site, not simply see the outline of the extension, garage or outbuilding.
Another is stopping at the front gate when the site needs access to the public highway. This is particularly easy to miss with a long rural drive, a rear plot or shared access.
Other problems include:
- Leaving a gap so the red boundary does not form a closed shape
- Cutting through a building or clipping part of the garden by mistake
- Including neighbouring land simply to make the site easier to spot
- Forgetting a separate blue line around other nearby land you own
- Using different red boundaries on the location plan and site plan
- Drawing such a heavy line that it hides map detail
- Submitting an unlicensed screenshot instead of suitable planning mapping
The last visual check matters. A boundary can look accurate while editing but become awkward on the final PDF. Always inspect the downloaded file.
Keep the boundary consistent across your plans
Your location plan and site or block plan show different levels of detail, but they should tell the same story. If both carry a red line, the site it encloses should be consistent.
Also compare the map with the application address, site area and proposed drawings. If a new access is shown on the design plan but sits outside the red line, or the form describes land that the map does not include, the council may need clarification.
Do not stretch or resize the map to make a boundary fit. Use the appropriate plan scale instead. When printing a PDF that must remain to scale, select 100% or actual size rather than “fit to page”.
What happens if the council asks for a red line?
A request for a corrected boundary does not necessarily mean there is a problem with the proposed development. Sometimes the map simply needs a clearer outline before the application can move through validation.
Mrs Grabham's experience is a good example. Her council later asked for red lines to be added. She contacted UK Planning Maps, and the team amended and resent the plans promptly.
If you receive a similar message, read it carefully before changing anything. The council may want a missing red line, a revised application area or a blue outline for other owned land. Sending the same map with a thicker line will not help if the requested boundary itself is different.
Final checks before ordering or submitting
Before you pay, pause at the preview and ask:
- Is this definitely the right property or parcel of land?
- Does the red line close around the complete application site?
- Have I included necessary access to the road?
- Is other nearby land I own shown in blue where required?
- Can I still read the roads, building outlines and other key detail?
- Does the map show north and the correct scale?
- Does the boundary agree with my other plans and application form?
After downloading, check the actual PDF. Upload it without rescaling or turning it into a screenshot. For printing, keep the original paper size so the stated scale is preserved.
Drawing a red line boundary for planning is not difficult, but it deserves more than a quick scribble. Decide what the application site includes, follow its perimeter carefully and check access, ownership and consistency before submitting. A clear boundary lets the council see straight away which land your application is about.
Ready to Get Your OS Plans?
Every plan is instantly downloadable, Planning Portal‑compliant, and includes all required elements. Get your plan now and submit your application with confidence.