
How to Buy a Location Plan Online for Planning
A simple, clear guide explaining what a location plan is, how to draw red and blue boundaries, and how to download an OS‑licensed, Planning Portal‑compliant plan.
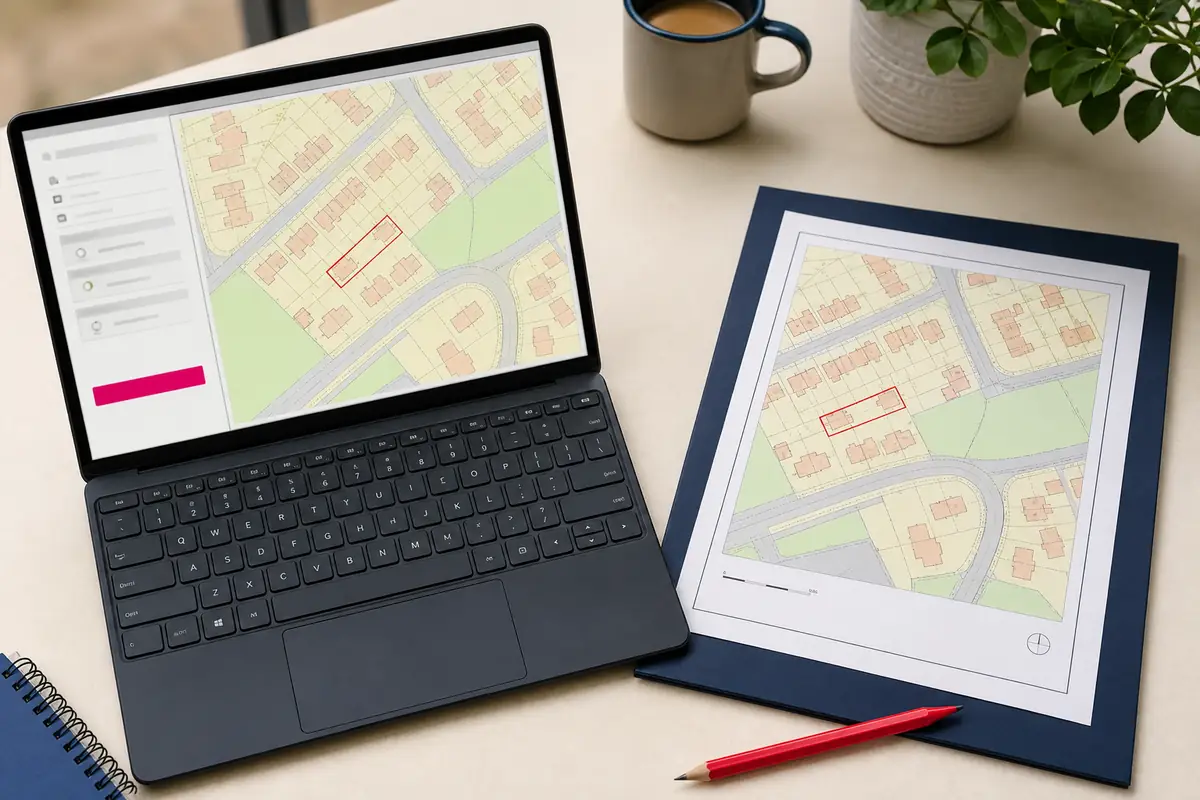
Buying a location plan online should be one of the easier parts of a planning application. You find the property, choose the map, draw the boundary and download the PDF. Even so, the scale, area shown and red line all need to make sense when a planning officer opens the file. This guide takes you through the process in plain English.
Before you order, check what the council has asked for
Start with the validation checklist on your local planning authority's website. Local requirements can differ. If the council has written to you about an invalid application, follow that letter rather than guessing what it means.
Look in particular for the plan type, scale and paper size. A location plan is usually requested at 1:1250 or 1:2500, but the scale must suit the site and the authority's instructions. You may also be asked for a separate site plan or block plan at a closer scale.
Have the address, postcode and application boundary to hand. For land without a postal address, coordinates or an on-screen map search may be more useful.
What a location plan is there to do
A location plan shows where the application site is in relation to its surroundings. It should give the planning officer enough context to find the land without having to work it out from the written address alone.
That means showing nearby roads, buildings and other recognisable features. The plan should include a north point, a stated metric scale and current, properly licensed mapping. The application site is outlined in red. Other nearby land owned by the applicant may need a blue outline when it sits outside the application site.
The red line does not show only the footprint of a proposed extension or building. It identifies the land covered by the application, which can include the house, garden, access and parking.
If you would like to see the finished layout before ordering, look at the location plan examples. They make the difference between the map itself and the boundary markings much easier to understand.
Choose a scale that suits the site
For many houses in towns, villages and built-up areas, a 1:1250 location plan gives a useful balance. The property remains easy to see while the map still shows the surrounding street and neighbouring buildings.
A 1:2500 plan covers more ground. It is often better for rural properties, fields, larger sites and places set back from a named road.
More coverage is not automatically better. A very wide view can make the boundary hard to read, while a close crop may leave out the road or neighbouring properties. Follow the council's scale where one is given, then ask: could somebody unfamiliar with the area locate this site confidently?
How to buy a location plan online for planning
1. Find the correct property or parcel of land
Go to the online map ordering page and search using the postcode. Check the result carefully, especially where one postcode covers several homes or buildings. If there is no useful postcode, use the advanced map search to move to the right position.
Do not rely on the address label alone. Compare the building shape and road layout with what you know, particularly for new plots, flats, farms and backland sites.
2. Select the plan and scale
Choose a location plan rather than the more detailed site or block plan. Select 1:1250 or 1:2500 according to the council's requirement and the setting of the site. Then look at the coverage shown in the preview.
The whole site must fit on the page with enough surroundings to identify it. If the property sits near the edge, reposition the map.
3. Draw the red boundary
Outline the application site in red, zooming in if needed. Include all land that forms part of the application, not just where building work will happen.
For a new driveway, the red line may need to reach the public road. The boundary should agree with the address, ownership information and other drawings.
4. Add a blue boundary if it is required
A blue line identifies other nearby land in the applicant's ownership that sits outside the red line, such as an adjoining field, garden or property.
Use blue only where the ownership and council requirements call for it. For a complicated ownership position, ask the authority or a professional adviser.
5. Check the preview before paying
Take a minute to look over the completed preview. Make sure:
- The map is centred on the correct site
- The whole application site is inside the map area
- The red line follows the intended boundary and remains easy to see
- Any blue line is used correctly
- The north point and scale are visible
- Nearby roads and buildings give enough context
This short check is worthwhile. One customer, Mrs Dawson, came to UK Planning Maps after a location plan she had prepared herself was rejected. She used the online chat to work out what was needed, received the correct plan within minutes and reported that the council verified it the following day. It is a useful reminder that a quick question can save much more time later.
6. Download and check the final PDF
Once payment is complete, download the PDF and save it with the rest of your application documents. Open the actual file rather than relying only on the web preview. Check that the boundary, labels, north point and scale are clear at normal viewing size.
If you print the plan, use the intended paper size and print at 100% or actual size. A “fit to page” setting can resize the map and alter its printed scale. Keep an unchanged digital copy ready for upload to the relevant planning application service.
Why an online screenshot is not a planning plan
It can be tempting to use a screenshot from a consumer mapping website. It may have no reliable printed scale, lack the required detail or not be licensed for planning use. Cropping or resizing can make matters worse.
A supplied planning map has a known scale and licence information. UK Planning Maps uses Ordnance Survey MasterMap-based mapping, giving the plan a consistent base. You still need to mark the correct site.
Location plan or site plan: do you need both?
The two plans answer different questions. A location plan answers “where is the site?” A site plan, often called a block plan, answers “what is on or close to the site, and where does the proposal sit?”
The site or block plan is normally drawn at 1:200 or 1:500 and shows closer detail, which may include buildings, access, parking, trees, hard surfaces and boundaries. You can read more about site and block plans before ordering.
Many applications need both. Supplying a detailed site plan does not necessarily remove the need for the wider location plan, and the location plan is not a substitute for architectural floor plans or elevations.
Common errors to avoid
Watch for the wrong scale, an incomplete red line and too little surrounding detail. Do not reuse an old plan if the site or access has changed.
The file should also match the rest of the submission. Check the address, red-line area, ownership certificate and design drawings together before uploading them.
Professionals ordering maps regularly may find trade account pricing useful, while architects and designers may prefer editable CAD mapping for plans that need further technical work.
A final check before you submit
Buying a location plan online is quick, but the final minute of checking still matters. Confirm the council's requirements, choose the scale for the site, draw the red line around the correct land and add blue only where needed. Then open the downloaded PDF and make sure it remains clear.
If something does not look right, ask before submitting it. A location plan is a small part of the overall application, but getting it right helps the council identify the site and move on to the proposal itself.
Ready to Get Your OS Plans?
Every plan is instantly downloadable, Planning Portal‑compliant, and includes all required elements. Get your plan now and submit your application with confidence.